Interactive Global Map - Climate Crisis

Climate Crisis

*

Climate Crisis *

More from Katherine E. Folley

Racism as a Mental Health Issue

Coming Soon! Katherine Folley agreed to record a Podcast about her career and current work so be sure to look for that in our next episode (Episode 5) of Edible Insights! Below we’ve included an interview from 2020 regarding the interconnected issues of race discrimination and racism and the quality of health care.

Vaccine Roll-out (Jan. 2021)

Chocolate Covered Strawberries for Your Valentine

Looking for a beautiful and simple treat to share with your Valentine this month? Try your hand at making this fruit-filled classic!

You’ll need:

Whole strawberries

Chocolate of your choice, though the higher the quality and cocoa content the better

White chocolate for drizzling (optional)

Parchment paper

Toothpicks

Something to pipe chocolate if you want to get fancy

Directions:

1. Rinse and dry the strawberries.

2. Lay out your parchment paper.

3. In a dipping bowl, melt the dark chocolate in the microwave in 30-second increments. Stir the chocolate so it doesn’t burn.

4. Dip each strawberry into the melted chocolate, coating on all sides and then transfer the parchment paper. Leave for 15 - 20 minutes until the chocolate is cool and hardened.

5. Meanwhile, melt the white chocolate. Put white chocolate in a piping bag or sandwich bag with the corner cut off.

6. Drizzle the white chocolate over the chocolate covered strawberries. Let the chocolate set completely before serving.

Enjoy!

Perfectly Soft and Chewy Snickerdoodle Cookies

Snickerdoodle Cookies

By Karen, The Food Charlatan

Karen is an excellent food blogger and created this featured recipe.

Click Here to Find her full blog and important hints for this recipe!

Snickerdoodle Cookies do not have to be bland flavorless hockey pucks! My favorite easy recipe gives you the BEST soft and chewy Snickerdoodles that are bursting with flavor from a double dip in cinnamon sugar. I'll give you all my tips to make sure your cookies don't turn out dry and crumbly!

Servings: 33 COOKIES
Prep Time: 20 MINS | Cook Time: 10 MINS | Total Time: 30 MINS

Ingredients

  • 1 cup salted butter, 2 sticks

  • 1 and 1/3 cup granulated sugar

  • 1/3 cup brown sugar, packed

  • 2 large eggs

  • 2 teaspoons vanilla extract

  • 3 and 1/4 cups all-purpose flour, spooned and leveled

  • 1 teaspoon baking soda

  • 3/4 teaspoon kosher salt

  • 1 and 1/2 teaspoons cream of tartar

For rolling

  • 1/3 cup granulated sugar

  • 1 and 1/2 tablespoons cinnamon

Instructions

  • Preheat the oven to 350 degrees and prepare a few baking sheets with parchment paper, or line with a silicone mat.

  • Make the dough. In a large bowl or stand mixer, beat 1 cup butter for a couple minutes until smooth, scraping the sides and bottom a few times in between.

  • Add 1 and 1/3 cup white sugar and 1/3 cup packed brown sugar. Beat for 2 minutes, taking the time to scrape the bottom and sides of the bowl in between. Your butter and sugar should be light and fluffy with no chunks at all.

  • Add 2 eggs and 2 teaspoons vanilla. Beat well, scraping the sides and bottom of the bowl. Make sure you beat it long enough that it becomes smooth and homogenous.

  • Add 3 and 1/4 cups flour (be sure to spoon it into the measuring cup! Don't dip your cup into the flour bin, you will pack your flour and end up with too much!) Don't mix the flour in yet.

  • Use a small spoon (I use my teaspoon) to stir 1 teaspoon baking soda, 3/4 teaspoon kosher salt, and 1 and 1/2 teaspoons cream of tartar into the flour. Gently beat the flour mixture into the butter mixture. Don't overdo it. There should still be flour streaks when you stop your mixer. Use a spatula to scrape down the edges of the bowl.

  • Continue beating just a few more seconds until all the flour streaks are gone. Do not over mix! You want to make sure all the ingredients are combined, but once that is done, stop mixing. Over mixing dough = tough cookies.

  • Use a large cookie scoop or a spoon to shape the dough. You want dough balls that are about 1 and 1/2 to 2 inches across. I used this cookie scoop.

  • Roll the cookies. In a small or medium bowl, add 1/3 cup sugar and 1 and 1/2 tablespoons cinnamon. Stir together. Roll the shaped cookies in the cinnamon-sugar to coat. (Reserve the remaining cinnamon-sugar!)

  • Place cookie dough balls on the prepared baking sheet with about 2 inches in between them. I can fit 12 cookies on an 11x17 baking sheet.

  • Bake the cookies at 350 for about 9-11 minutes, until the edges are barely set. It's ok if the centers of the cookies (about the size of a quarter) are still shiny. The rest of the cookie should be matte. It's VERY important to not over bake snickerdoodles; underbaking slightly is what helps give them that soft and chewy texture. (Dry Snickerdoodles taste like chalk. Don't be like that.)

  • Shape the cookies. Immediately after taking the cookies out of the oven, use a spoon to push the edges of the cookies toward their centers. This makes the cookies round in shape and makes the center thicker and more chewy. You have to do this within 30-60 seconds of taking them out of the oven, before the edges harden. Enlist help if you can! See my Chewy Chocolate Chip Cookies recipe for more details about this technique!

  • Let the cookies set up on the pan for at least 3-5 minutes. Remove the cookies to a wire cooling rack and let cool for a few minutes.

  • While the cookies are still warm, but cool enough to handle (and not falling apart), place each cookie back into the bowl of cinnamon sugar*. Coat one side of the cookie, then flip it over and coat the other side. This gives you the ultimate cinnamon-sugar edge to your snickerdoodle! Enjoy one right away with a glass of milk!

  • Freezer instructions: You can freeze this dough and bake later! I like to shape the dough into balls, roll them in cinnamon sugar, and store them in a ziplock bag. They will keep in the freezer for up to 3 months. I never thaw cookie dough before baking. Just bake straight from frozen and add a couple minutes to the bake time. Voila!

Notes

*If you are squeamish about using the same cinnamon-sugar that you used to roll the raw dough in, feel free to just get a new bowl and measure out another 1/3 cup sugar and 1 and 1/2 tablespoons cinnamon (or just eyeball it).

Nutrition

calories: 147 kcal, carbohydrates: 22 g, protein: 2 g, fat: 6 g, saturated fat: 4 g, polyunsaturated fat: 1 g, monounsaturated fat: 2 g, trans fat: 1 g, cholesterol: 26 mg, sodium: 140 mg, potassium: 44 mg, fiber: 1 g, sugar: 12 g, vitamin a: 189 iu, vitamin c: 1 mg, calcium: 9 mg, iron: 1 mg

Don't Let Salmonella Steal Center Stage!

Tips for Safe Turkey Preparation!

Are you preparing a turkey for your holiday meal? Turkey and its juice can be contaminated with germs that can make you and your family sick. For example, turkey can contain SalmonellaClostridium perfringensCampylobacter, and other germs. Whether you’re cooking a whole bird or a part of it, such as the breast, you should take special care. Follow the steps below to safely store, thaw, handle, and cook your turkey.

1. Store Turkey Properly

  • Frozen raw turkey should be stored in the freezer until you are ready to thaw it. Make sure your freezer is at 0˚F or below. Don’t store a turkey in a place where you can’t closely monitor the temperature, such as in a car trunk, a basement, the back porch, or in snow.

  • Fresh raw turkey can be stored in the refrigerator 1–2 days before cooking.

2. Thaw Turkey Safely

Use one of these methods to thaw your turkey:

  • Thaw your turkey in the refrigerator.

    • Keep your turkey in its original wrapping and place it in a container before putting it in the refrigerator. The container will prevent the turkey’s juice from dripping on other food.

    • Allow about 24 hours of thawing for each 4 to 5 pounds of turkey.

    • A turkey thawed in the refrigerator can remain in the refrigerator for 1–2 days before cooking.

  • Thaw your turkey in cold water.

    • Be sure your turkey is in a leak-proof plastic bag before you place it in the sink. The bag will prevent the turkey’s juice from spreading in the kitchen. It will also prevent the turkey from absorbing water, which can make your cooked turkey runny.

    • Make sure your turkey is fully covered with the cold tap water.

    • Change the water every 30 minutes.

    • Allow about 30 minutes of thawing for each pound of turkey.

    • A turkey thawed in cold water must be cooked immediately after thawing.

  • Thaw your turkey in the microwave.

    • Follow the microwave manufacturer’s instructions for thawing turkeys.

    • A turkey thawed in the microwave must be cooked immediately after thawing.

  • Never thaw your turkey by leaving it out on the counter. A turkey must thaw at a safe temperature. When a turkey stays out at room temperature for more than 2 hours, its temperature becomes unsafe even if the center is still frozen. Germs can grow rapidly in the “danger zone” between 40°F and 140°F.

3. Handle Turkey Correctly to Prevent the Spread of Germs

Raw turkey and its juice can contaminate anything they touch. Be sure to handle your turkey correctly to prevent harmful germs from spreading to your food, family, and friends. 

  • Wash your hands with soap and water for 20 seconds before and after handling turkey.

  • Use a separate cutting board for raw turkey.

  • Never place cooked food or fresh produce on a plate, cutting board, or other surface that held raw turkey.

  • Wash cutting boards, utensils, dishes, and countertops with hot soapy water after preparing raw turkey and before you prepare the next item.

  • Do not wash or rinse raw turkey. Washing your turkey can make you and your family sick. Poultry juices can spread in the kitchen and contaminate other foods, utensils, and countertops.

4. Cook Stuffing Thoroughly

It’s safest to cook stuffing in a casserole dish instead of inside your turkey. Cooking stuffing in a casserole dish makes it easy to be sure the stuffing is thoroughly cooked. If you do cook stuffing in the turkey, put the stuffing in the turkey just before cooking.

With either cooking method, use a food thermometer to make sure the stuffing’s center reaches 165°F. Germs can survive in stuffing that has not reached 165°F. If you cooked the stuffing in your turkey, wait 20 minutes after taking the bird out of the oven before removing the stuffing.

5. Cook Turkey Thoroughly

To roast a turkey in your oven, set the oven temperature to at least 325°F. Place the completely thawed turkey in a roasting pan that is 2 to 2-1/2 inches deep. Cooking times depend on the weight of the turkey and whether it is stuffed.

Use a food thermometer to make sure the turkey has reached a safe minimum cooking temperature of 165°F. Check by inserting a food thermometer into the center of the stuffing and the thickest part of the breast, thigh, and wing. Even if your turkey has a pop-up timer, you should still use a food thermometer to check that it is safely cooked. Let the turkey stand 20 minutes before removing all stuffing from the cavity and carving the meat. This will let the stuffing cook a little longer and make the turkey easier to carve.

If you are cooking your turkey using another method, such as smoking or frying it, or roasting a turkey that is not fully thawed, follow these guidelines for cooking your bird safely.

Learn more about safe minimum cooking temperatures for other foods and how to use a food thermometer.

6. Take Care of Leftovers

Refrigerate leftovers at 40°F or colder within 2 hours of serving to prevent food poisoning. Slice or divide big cuts of meat, such as a roast turkey, into small quantities for refrigeration so they can cool quickly. Reheat all leftovers to at least 165°F before serving.

Cooked turkey and dishes made with turkey, such as a casserole, can be stored in the refrigerator for 3 to 4 days or can be frozen to store longer.

Always refrigerate leftovers within 2 hours, or 1 hour if exposed to temperatures above 90°F (like a hot car or picnic).

Original Link: https://www.foodsafety.gov/blog/preparing-your-holiday-turkey-safely

TSA Approved Checkpoint Safe Foods

As travel is opening back up for this holiday season, you might be planning a trip towards thanksgiving dinner. It might even be your first trip since things shutdown last year. Well, we want this first sojourn to go as smoothly as possible for you so we’ve included a list of food items you can and cannot take through the TSA checkpoint. Keep in mind that some airlines and airports may be even more restrictive but here are the current TSA guidelines:

Thanksgiving foods that can be carried through a TSA checkpoint

  • Baked goods. Homemade or store-bought pies, cakes, cookies, brownies and other sweet treats

  • Meats. Turkey, chicken, ham, steak. Frozen, cooked or uncooked

  • Stuffing. Cooked, uncooked, in a box or in a bag

  • Casseroles. Traditional green beans and onion straws or something more exotic

  • Mac ‘n Cheese. Cooked in a pan or traveling with the ingredients to cook it at your destination

  • Fresh vegetables. Potatoes, yams, broccoli, green beans, Brussels sprouts, cauliflower, beets, radishes, carrots, squash, greens

  • Fresh fruit. Apples, pears, pineapple, lemons, limes, cranberries, blueberries, strawberries, bananas, kiwi

  • Candy.

  • Spices.

Thanksgiving foods that should be carefully packed with your checked baggage

  • Cranberry sauce. Homemade or canned are spreadable, so check them.

  • Gravy. Homemade or in a jar/can.

  • Wine, champagne, sparking apple cider.

  • Canned fruit or vegetables. It’s got liquid in the can, so check them.

  • Preserves, jams and jellies. They are spreadable, so best to check them.

  • Maple syrup.

There’s more so you should definitely Check out the full list of tips and guidelines here!

Safe Travels!

Food Fraud: A Global Problem

We don’t always talk about how food fraud is a global issue but in truth, anything that affects the global market affects us here at home as food is one of our greatest import/export items. That said, you might be interested in this resource for Canada, one of our nearest neighbors.

Click to Read!

Additionally, Canada is have a particularly hard time with fish! Check out this quick campaign video below:

Caffeine Consumption: Good, Bad, or Both?

Where do you fall on the coffee spectrum? Do you start your day with a cup or are you more of a tea person? Maybe you’re caffiene free, in which case the following videos may be a little important but, for those of us that inject a stream of caffeine into our bloodstream one to several times a day, this information is essential and vital as we reexam our daily habit. We’ve got some pros…we’ve got some cons, and we’ve got to make a decision that best supports our health!

PFAS Resources:

Click below to check out this interactive map of PFAS hotspots.

2,500+ industrial locations in the United States are likely the source of toxic PFSAs linked to cancer and other human health problems leaking into the environment. Photo courtesy of Environmental Working Group

Healthy Holiday Bark

This one is for the chocolate lovers. Want something sweet and chocolaty with a positive net impact on your health and your taste buds? Try this delicious twist on holiday chocolate bark by
The Movement Menu:

This decadent, fudgy and crunchy Healthy Holiday Bark has all the fix-ins: roasted pumpkin seeds, creamy dark chocolate, and a delicious matcha swirl. It’s a quick & easy, paleo, vegan and allergen-friendly holiday treat!

Prep Time: 5 minutes | Cook Time: 20 minutes | Chilling: 45 minutes

Total Time: 1 hour 10 minutes | Servings: 8

Author: Monica Stevens Le of The Movement Menu

Ingredients

Chocolate Base

  • 1 cup dark chocolate chips

  • 2 1/2 tablespoons coconut oil

  • 1/4 cup canned coconut milk

Matcha Drizzle

  • 1/2 cup canned coconut milk

  • 2 teaspoons matcha powder

  • 2 teaspoons coconut oil

Pumpkin Seeds

  • 1 teaspoon coconut oil

  • 1 cup pumpkin seeds

Toppings

  • 1/4 cup unsweetened coconut flakes

Instructions

  • Line a large baking sheet with parchment paper or a silicone baking mat. Set aside.

  • Using a double boiler or a glass bowl in the microwave, melt the chocolate chips and coconut oil together. Stir in the coconut milk. Set aside.

  • In another small bowl, whisk together the matcha drizzle ingredients. Set aside.

  • In a medium frying pan, add coconut oil and coat the bottom. Add the pumpkin seeds. Toast on the stove for 10-15 minutes until they begin to turn golden brown and start making a popping noise. Add the pumpkin seeds to the chocolate mixture.

  • Pour chocolate and pumpkin seeds mixture onto the prepared baking sheet, spreading with a rubber spatula into a smooth layer.

  • Drizzle the matcha mixture over the base. Sprinkle coconut flakes over the top. Transfer to the freezer to set for at least 30-45 minutes.

  • Cut into triangles or squares and serve directly from the freezer.

Notes

This recipe would also work with sunflower seeds instead of pepitas.

Nutrition

Calories: 356kcal | Carbohydrates: 20g | Protein: 7g | Fat: 29g | Saturated Fat: 17g | Sodium: 6mg | Fiber: 4g | Sugar: 14g

Halloween snacks everyone can enjoy!

Are you looking for a healthy alternative to all the candy this Halloween? We’ve got the perfect post for you to check out! From witchy finger food for you and your friends to fun, quirky dishes for the kids, this list is sure to give you lots of good idea for this coming weekend!

Here’s one recipe to get started! The rest you will find HERE.


Paleo And Vegan Witch Finger Cookies

By Emily, The Health Table


SERVES:16 | PREP: 45 minutes COOK:15 minutes

TOTAL:1 hour

INGREDIENTS

For the cookies:

  • 1/4 Cup + 3 Tbs Honey * *

  • 1/2 Cup Coconut oil at room temperature (should be the consistency of softened butter)

  • 1/2 tsp Vanilla extract

  • 1/2 tsp Almond extract

  • 1 Cup Coconut flour sifted (88g)

  • 1/4 tsp salt

  • 16 sliced almonds

For the strawberry jelly: **

  • 3/4 Cup frozen strawberries thawed and roughly chopped (170g - measured when fully thawed and soft)

  • 2 Tbsp Honey *

Get Ingredients

INSTRUCTIONS

  • In a large bowl, using an electric hand mixer, beat together the honey and coconut oil and smooth and creamy. Add in the vanilla and almonds extracts and beat once more.

  • Add the coconut flour and salt into the bowl and stir until well combined, and a wet dough forms. Scrape the dough onto a large piece of saran wrap and wrap into a flat, thin disc. Place into the refrigerator until firm and roll-able, about 25-30 minutes.

  • While the dough chills, preheat your oven to 325 degrees and line a baking sheet with parchment paper. Set aside.

  • In a small sauce pan, combine the chopped berries and honey and bring to a boil over medium heat. Cook the berries, stirring frequently, until they become very thick and smooth, about 13-14 minutes. Make sure to really keep an eye at them near the end of cooking time, so they don't burn.

  • Transfer the berry mixture to a bowl and mash with a fork. Place into the refrigerator to set up.

  • Remove the dough from the refrigerator and roll 1 Tbsp sized balls into 4 inch long finger-shapes, that are about 1/2 an inch thick. Place onto the prepared baking sheet and firmly press an sliced almond into the tip of the finger, to create fingernails. Remove the almond before baking. Then, using a small, sharp knife, make several horizontal, shallow cuts just under the finger nail, and then in the center of each finger, to represent knuckles. Lightly press in the dough on either sides of the knuckles to shape them. Place the whole pan into the freezer for 10 minutes.

  • Once frozen, bake the cookies until golden brown, and lightly crackly (the cracks are normal, don't worry!) about 12-13 *** minutes. Let cool on the pan COMPLETELY.

  • Once cooled, dip the bottom of the finger into the strawberry jam, so it looks like it's been cut off. Then, fill the finger nail space with a dollop of the jam, and press in a sliced almond.

  • DEVOUR.

TIPS & NOTES:

Use equal parts agave for vegan
*You will only use about half of the jam, but it's hard to make a smaller amount with it burning.
***I found that using agave required a few more minutes of baking time, just 1 or 2 more minutes!
Store cookies in an air-tight container in the refrigerator. They will become crunchy, as the coconut oil will harden once chilled. Just let them sit at room temperature for a few minutes before serving, if you like a softer cookie.

ENJOY!!!

Exercises you can do at your desk!

Here are two sample workouts from Healthline that you can do at your desk!

Sample 5-minute workout

Perform each exercise one after the other, without rest between exercises. Do one set of each exercise.

  1. Desk pushups: 20 reps

  2. Seated knee-to-chest: 10 reps

  3. Squats: 10 reps

  4. Desk plank: 30 seconds

  5. Seated flutter kicks: 10 reps on each side

  6. Romanian deadlifts: 10 reps

  7. Jumping jacks: 20 reps

Sample 10-minute workout

Perform each exercise one after another without resting in between. After doing all six exercises, rest for 1 minute before repeating the routine a second time.

  1. Leg lifts: 10 reps on each side

  2. Wall sit: 30 seconds

  3. Seated shoulder press: 10 reps on each side

  4. Marching: 20 reps on each side

  5. Biceps curls: 10 reps on each side

  6. Side lunges: 10 reps on each side

Click here to see all 30 desk exercises and mix and match them to make your own personal workout! Remember, the most important thing is that you get up and move every 30 minutes! Have fun with it and enjoy those health benefits!

Real World Link: Infused Water Recipes

Untitled design (12).png

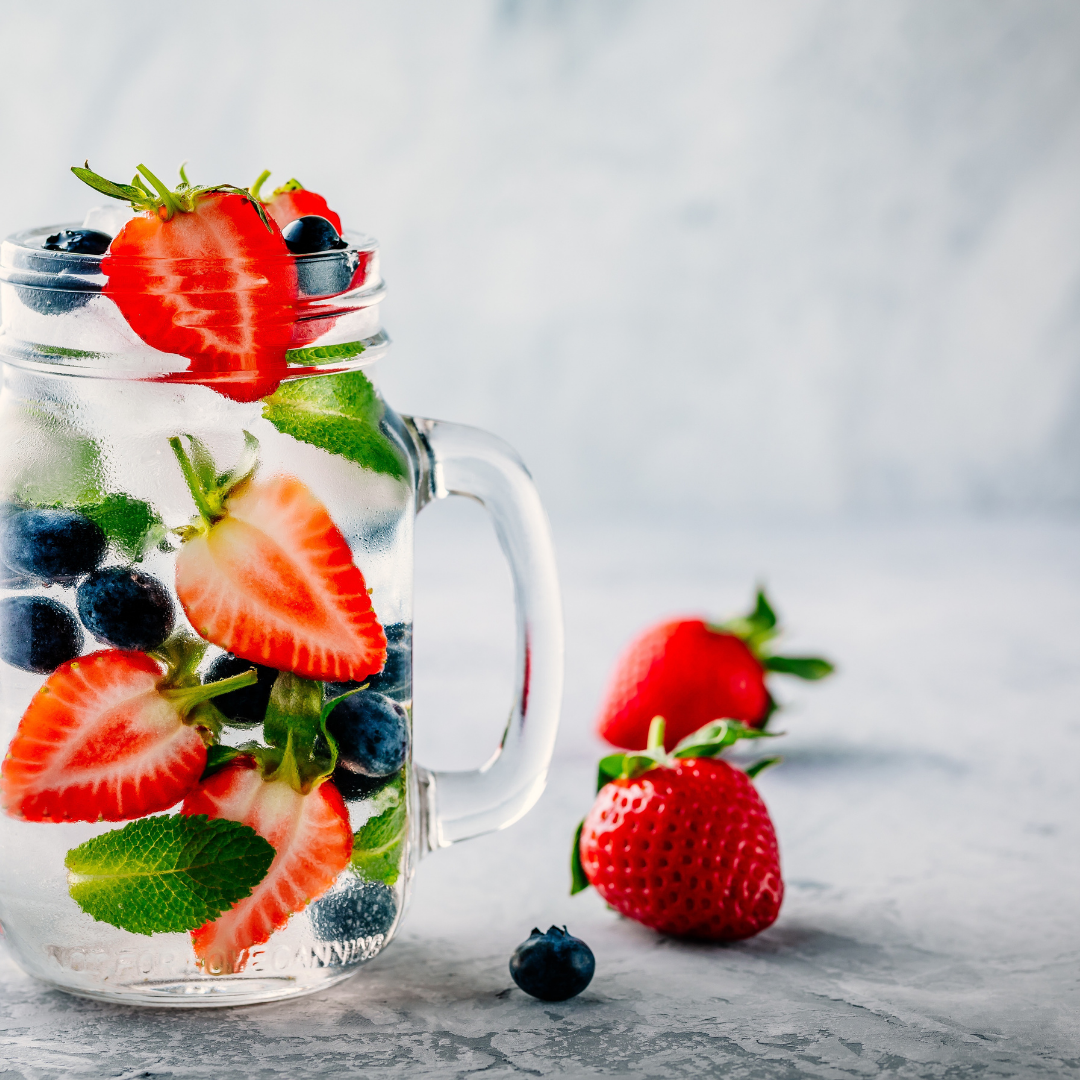
8 Infused Water Recipes

by Meggan Hill with Culinary Hill

Stay hydrated with these 8 Infused Water recipes! Inspired by The Flavor Bible, these fruit and herb combinations will encourage you to drink more water.

PREP TIME: 5 mins

TOTAL TIME: 5 mins

SERVINGS: 4 servings

CALORIES: 14

Ingredients US Customary Metric

For All Options:

  • ▢5 cups water

  • ▢1 cup ice cubes optional

For Strawberry, Basil and Lemon:

  • ▢1/2 cup strawberries stemmed and sliced, fresh or frozen

  • ▢5 large fresh basil leaves torn

  • ▢1 lemon thinly sliced

For Honeydew, Cucumber, and Mint:

  • ▢1/2 cup honeydew cubes

  • ▢1 cucumber thinly sliced

  • ▢10 fresh mint leaves torn

Blackberries, Orange, and Ginger:

  • ▢½ pint blackberries

  • ▢1 orange thinly sliced

  • ▢1 (2-inch) piece fresh ginger peeled and thinly sliced

Blueberry, Lemon, and Rosemary:

  • ▢1/2 pint blueberries

  • ▢1 lemon thinly sliced

  • ▢4 sprigs fresh rosemary

Pineapple, Coconut, and Lime:

  • ▢1 cup pineapple chunks, fresh or frozen

  • ▢1 cup coconut chunks, fresh or frozen

  • ▢1 lime thinly sliced

Watermelon, Kiwi, and Lime:

  • ▢1 cup watermelon cubes

  • ▢1 kiwi diced or cut into circles

  • ▢1 lime sliced into circles

Grapefruit, Pomegranate, and Mint:

  • ▢1 grapefruit thinly sliced

  • ▢1/2 cup pomegranate seeds

  • ▢10 fresh mint leaves torn

Mango, Raspberry, and Ginger:

  • ▢1 mango peeled and cubed

  • ▢1/2 pint raspberries

  • ▢1 (2-inch) piece fresh ginger peeled and thinly sliced

Instructions 

  • In a large pitcher, place the desired combination of fruit or herbs. Add ice and fill container with water. Add additional fruit or herbs to garnish, if desired.

Nutrition

Calories: 14 kcal Carbohydrates: 4g Protein: 1g Fat: 1g Saturated Fat: 1g Sodium: 18mg Potassium: 66mg Fiber: 1g Sugar: 2g Vitamin A: 34IU Vitamin C: 25mg Calcium: 21mg Iron: 1mg

If you enjoyed this recipe, check out the full article and other recipes here.